
Step-by-Step Guide to Installing Solar Panels on Metal Roofs
August 03, 2025
Installing solar panels on metal roofs is a practical solution for homeowners and businesses looking to harness renewable energy efficiently. Metal roofs are durable, long-lasting, and provide an excellent base for solar panel mounts for metal roof systems. This guide will walk you through the key steps involved in this installation process.
Before diving into the installation, it’s crucial to familiarize yourself with the different types of solar panel mounts for metal roofs. These mounts are specifically designed to securely attach solar panels to metal surfaces, ensuring they withstand environmental elements such as wind and rain. The most common options include clamps, rails, and brackets that are compatible with various metal roofing styles, such as standing seam or corrugated metal. Choosing the right type of mount is vital to your system's performance and longevity.
The first step in installing solar panels on metal roofs is to assess your roof's condition and structure. Ensure that the roof is clean and free of debris or damage that could interfere with the installation process. Once you've verified the roof's integrity, it's time to determine the best layout for your solar panels. Consider factors such as sun exposure, shading from nearby structures, and the overall angle of the roof for optimal energy absorption.
Next, gather all necessary materials, including solar panel mounts for metal roofs, solar panels, wiring, and tools required for the installation. It’s essential to follow local regulations regarding solar energy installations, which may dictate specific mounting methods or safety precautions.
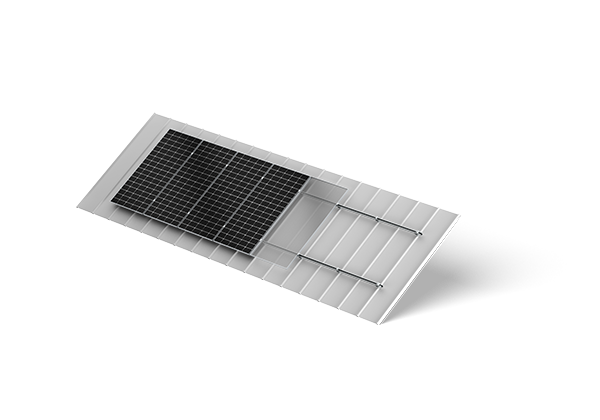
With preparation complete, you can begin the installation. Start by attaching the solar panel mounts for metal roofs according to the chosen layout. For standing seam roofs, you may utilize seam clamps that grip the seams without penetrating the metal, preserving the roof's waterproof integrity. Alternatively, for corrugated roofs, use lag bolts or self-drilling screws to anchor your mounts securely.
Once the mounts are in place, install the solar panels by aligning them with the mounts and securing them using the provided hardware. Ensure proper alignment and spacing between panels for efficient energy capture. After securing the panels, connect the electrical wiring, following the manufacturer's specifications to ensure compliance and safety.
Finally, perform a thorough inspection of the entire system, verifying that all connections are secure and that the panels are positioned correctly. This step is crucial to maximizing the efficiency of your solar energy system.
Installing solar panels on metal roofs can offer significant benefits in terms of durability and efficiency. By understanding the importance of solar panel mounts for metal roofs and following a systematic approach to installation, homeowners and businesses can effectively transition to renewable energy. As we at Antaisolar strive to advance the development of new energy solutions, we are committed to delivering high-quality products and services tailored to your solar energy needs.
Understanding Solar Panel Mounts for Metal Roofs
Before diving into the installation, it’s crucial to familiarize yourself with the different types of solar panel mounts for metal roofs. These mounts are specifically designed to securely attach solar panels to metal surfaces, ensuring they withstand environmental elements such as wind and rain. The most common options include clamps, rails, and brackets that are compatible with various metal roofing styles, such as standing seam or corrugated metal. Choosing the right type of mount is vital to your system's performance and longevity.
Preparing for Installation
The first step in installing solar panels on metal roofs is to assess your roof's condition and structure. Ensure that the roof is clean and free of debris or damage that could interfere with the installation process. Once you've verified the roof's integrity, it's time to determine the best layout for your solar panels. Consider factors such as sun exposure, shading from nearby structures, and the overall angle of the roof for optimal energy absorption.
Next, gather all necessary materials, including solar panel mounts for metal roofs, solar panels, wiring, and tools required for the installation. It’s essential to follow local regulations regarding solar energy installations, which may dictate specific mounting methods or safety precautions.
Installation Process
With preparation complete, you can begin the installation. Start by attaching the solar panel mounts for metal roofs according to the chosen layout. For standing seam roofs, you may utilize seam clamps that grip the seams without penetrating the metal, preserving the roof's waterproof integrity. Alternatively, for corrugated roofs, use lag bolts or self-drilling screws to anchor your mounts securely.
Once the mounts are in place, install the solar panels by aligning them with the mounts and securing them using the provided hardware. Ensure proper alignment and spacing between panels for efficient energy capture. After securing the panels, connect the electrical wiring, following the manufacturer's specifications to ensure compliance and safety.
Finally, perform a thorough inspection of the entire system, verifying that all connections are secure and that the panels are positioned correctly. This step is crucial to maximizing the efficiency of your solar energy system.
Conclusion
Installing solar panels on metal roofs can offer significant benefits in terms of durability and efficiency. By understanding the importance of solar panel mounts for metal roofs and following a systematic approach to installation, homeowners and businesses can effectively transition to renewable energy. As we at Antaisolar strive to advance the development of new energy solutions, we are committed to delivering high-quality products and services tailored to your solar energy needs.
end